
This section covers best practices for reproducing photographs onto fabric. It is intended as a quick guide to help you determine which images would be suitable for reproduction on fabric and which won’t be, whether supplied by yourself or by your customer. If you are unsure of an image that you plan on using regularly we strongly suggest you use our Test Print Service to ensure you receive the reproduction you are happy with.
Exposure
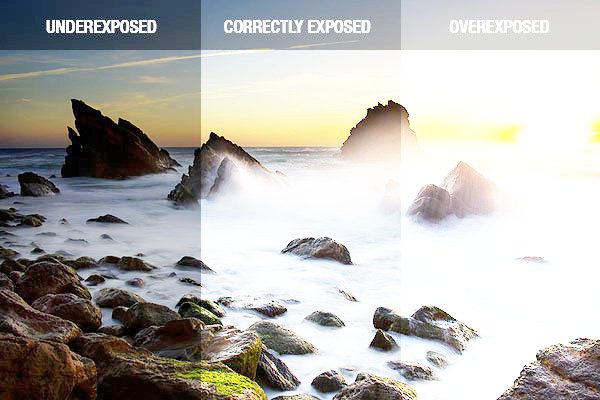
The most important thing in reducing photo reproduction onto fabric is exposure. When providing a photo take into account how “dark the image” Reproducing an image onto fabric will make the image look slightly “darker.” Take a look at the image below which helps explain exposure. For best results the level of “lightness” of your photograph wants to be about in the middle where the “correctly exposed” section is. The photo can be lighter than that so long as details aren’t lost by being too bright like the “over exposed” section.
Light Direction and Shadow on Portraits
Ideally light wants to be coming from behind the camera so the subject is lit up clearly. If light is coming from behind the subject the shadows caused will be extremely difficult to reproduce and keep detail.


Image Quality
The last most important thing for reproduction onto fabric is image quality. Images from social media sites such as Facebook will compress images to make them a smaller file size. Reducing their quality. This looks perfectly fine on a phone screen or a computer screen however when resized to the correct size for a cushion or other product the image will start to look pixelated / “blocky” or blurry. You can try this yourself by resizing the image to 45cm (our standard cushion size) in the photo editing software of your choice and zooming in bit to check for pixilation. The further in you can zoom before the image starts looking badly pixelated (blocky) the higher quality your photograph is.

